
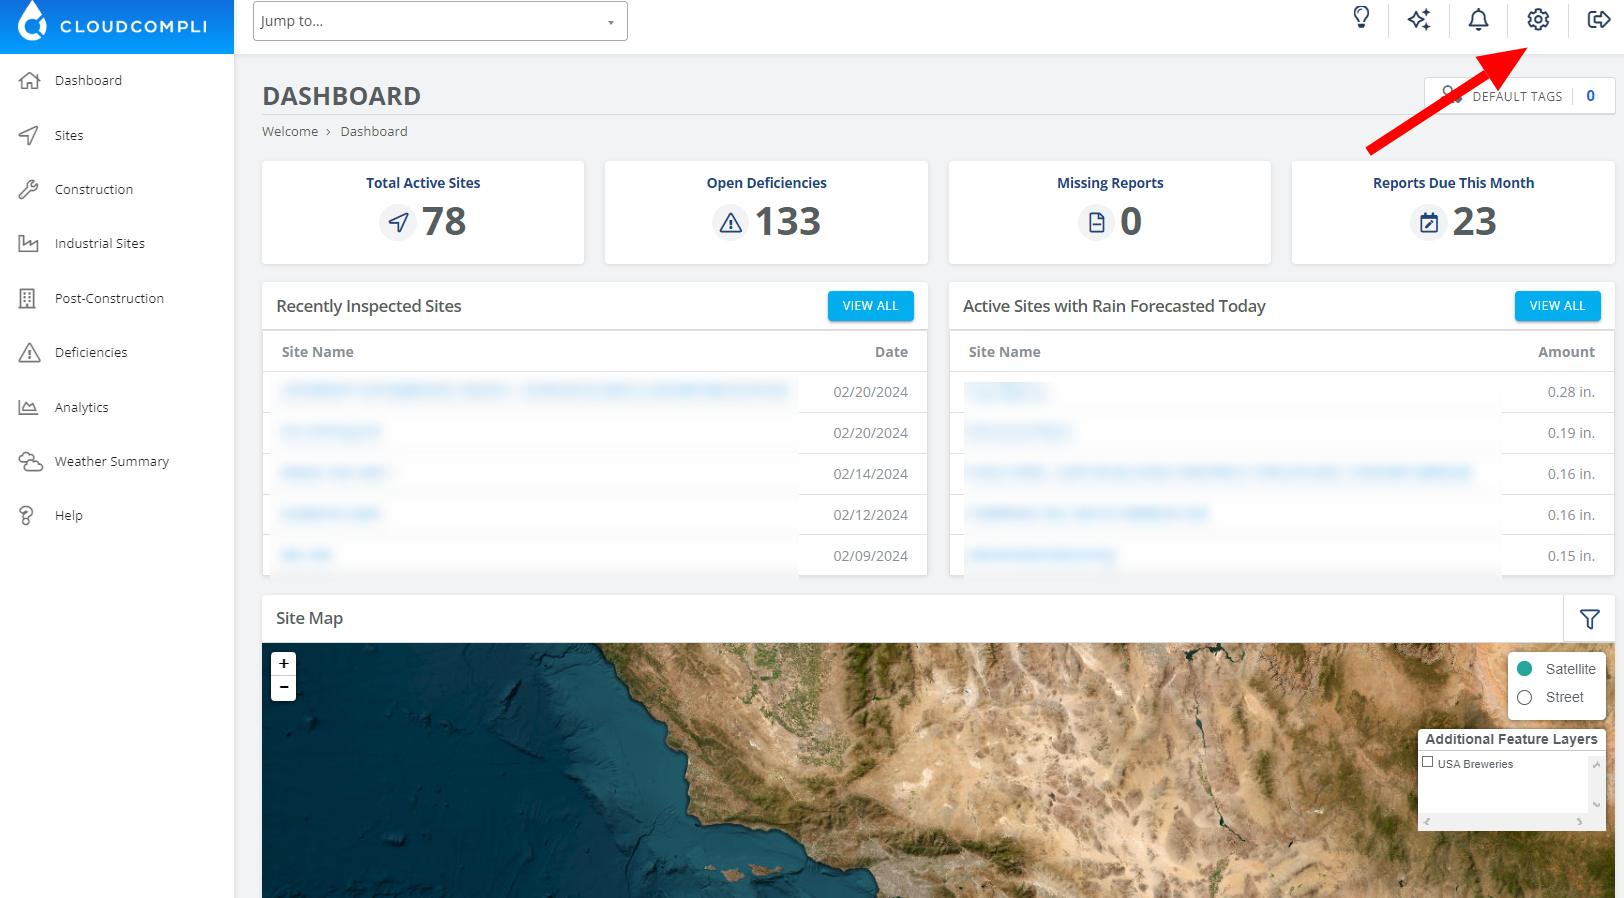
Start by locating the "Settings" option on your dashboard. This is typically represented by a gear icon "Settings". Click on the "Settings" to access the user settings page. This page is where you can adjust your preferences, manage account details, and access various configuration options related to your user account.
Once you are in the user settings area, look for the "Global Contacts" option. It may be listed among other settings, possibly under a section like 'Account', 'Communication', or 'Contacts'.
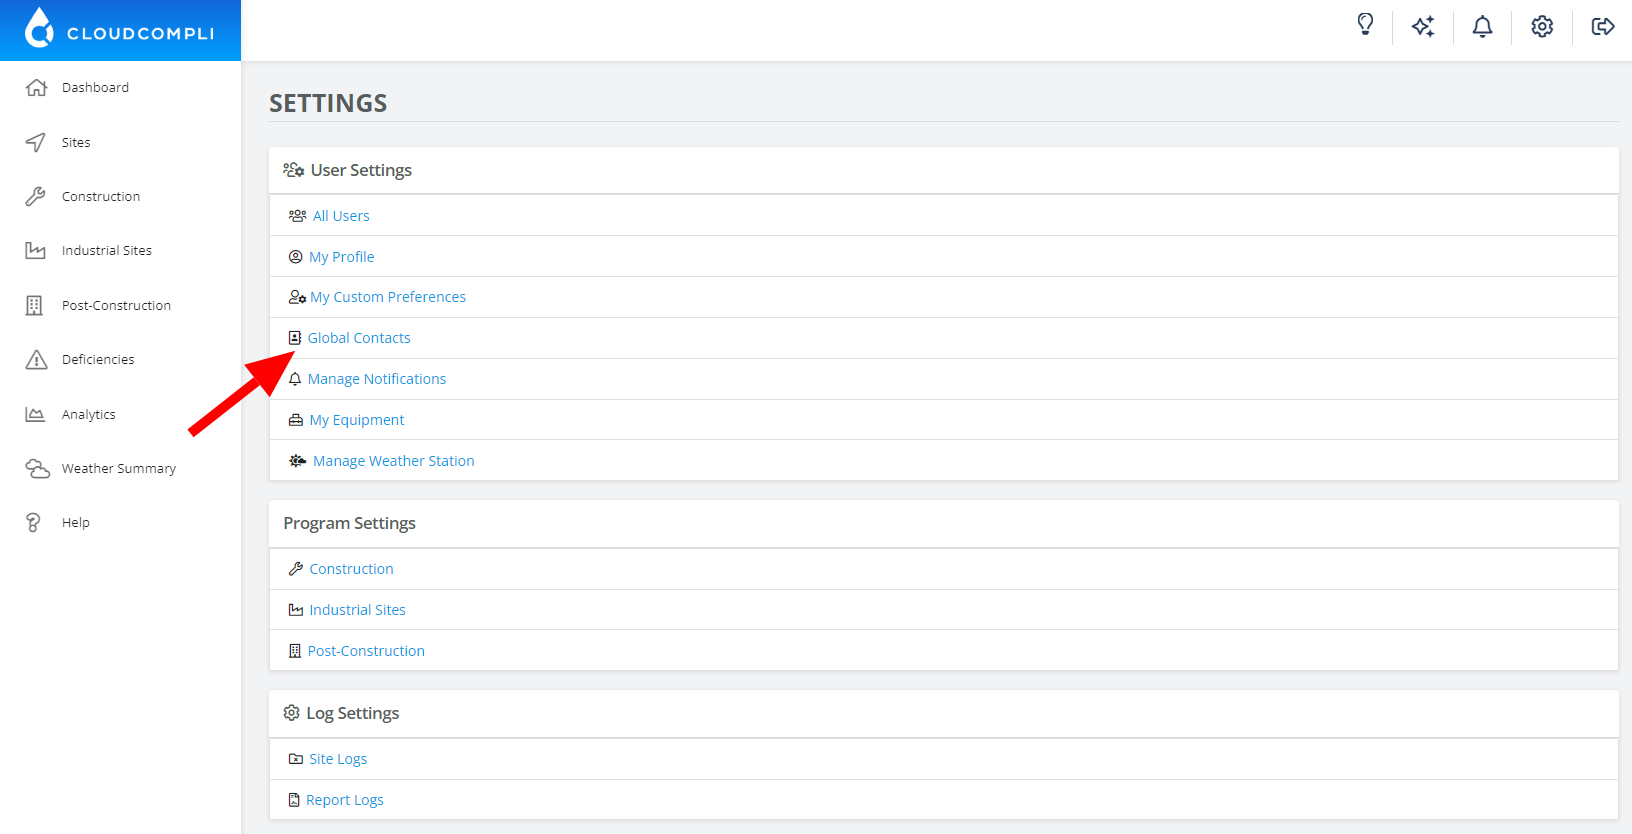
Click on "Global Contacts" to be directed to the page where you can view and manage your global contact list. Here, you can add new contacts, edit existing ones, download the contact list, and perform other related tasks.
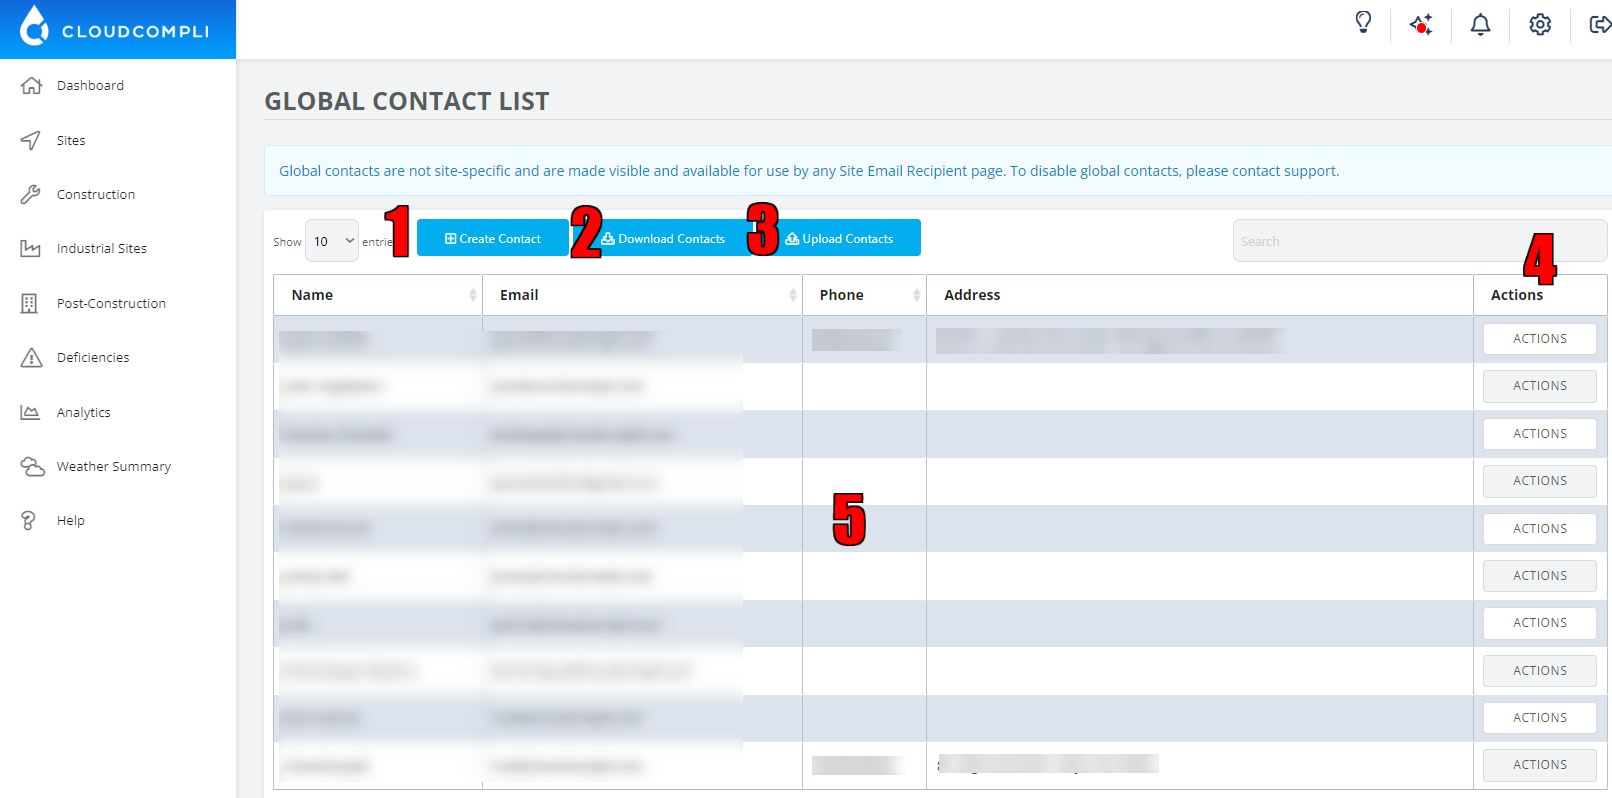
1. Create a Contact: Click the "Create Contact" button to add a new contact to the list. This would typically bring up a form to enter the name, email, phone, and address of the new contact.
2. Download Contacts: Click the "Download Contacts" button to save the contact list data, likely in a .csv or .xlsx format.
3. Upload Contacts: Click the "Upload Contacts" to add multiple contacts, probably through a file upload mechanism.
4. Actions:
Editing a Contact: Click the "Edit" button in the Actions column to modify the details of an existing contact.
Deleting a Contact: Click the "Delete" button to remove a contact from the list.
5. Contacts list: You can view the contacts in the list, with the ability to sort them by name, email, phone, or address by clicking on the respective column headers.